Thursday, May 26, 2011
my duck tape purse
This is my duck tape purse. My friend showed me hers and how to make it. It's really easy but the trick is to put plastic wrap or press and seal on the inside layer so you don't waste or use up all of your tape:)!!!
our duck tape agendas
These are the backs of our agendas. To the left is mine
and to the right is my sisters (I did them both).
But I did add on to the back of mine:)
The top agenda is my sisters (but I did it)
and the bottom is my agenda.
my duck tape tote
This is my duck tape tote that I made. It was just an old purple plastic tote but I covered it and now it looks much nicer and now it will match my room when I get my own!!! Also on the top I added some pink ribbon.
Saturday, January 22, 2011
My Last Years Birthday Cakes
These were my birthday cakes last year. I got the idea from Bakerella's website!!!
Tuesday, January 18, 2011
Dog Collar Bandanna
I'm going to show you how to make a homemade dog collar bandanna.
1. First you lay out the fabric and lay the collar on the fabric and measure the collar to the fabric to make the collar pocket a little wider than the collar to make sure that you can fit the collar through.
 |
| 2.Then you fold the pocket over and pin it. |
 |
| This is just a picture of my pin cushion that my Nana made me. |
3. The next thing you do is you measure with a square or a yard stick, we ended up having to use the square, and measure. We measured twelve inches because we have a large dog named Libby and she's a Great Pyrenees.
4. Here are the marks from measuring to help me cut.
5.In the picture above you also have to iron it then you unpin it and re-pin it to look like this and you sew it up
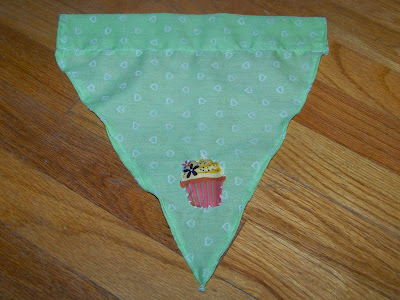
6.This is it what it should look something like when you have finished sewing for now.
This is just a close up of the collar pocket all sewn up.
 |
| 7. Next you take some cupcake fabric and cut out a cupcake that has at least a little bit of the same color as the original fabric color. |
 |
| 8.Then you hand sew both sides and the top but leave the bottom open and stuff with a cotton ball or nail polish remover pads that are torn up. |
9.Then you sew up the bottom.
 |
| 10.Next you measure and pin seam binding to both sides and you sew it up. |
This is me using my sewing machine.
And then your DONE!!!
 |
| This is a close up of the cupcake. |
 |
| And this is it on our dog Libby (back) |
 |
| and this is another picture (front) |
Friday, January 14, 2011
First Post
I'm so excited about my first blog I made it this morning and am so excited. I hope to have time to do some crafts and cooking. I got a new camera from Santa this year so I will hopefully post quite a few pictures.
Subscribe to:
Posts (Atom)


